A programmable logic controller (PLC) or programmable controller is an industrial digital computer which has been ruggedized and adapted for the control of manufacturing processes, such as assembly lines, or robotic devices, or any activity that requires high reliability control and ease of programming and process fault diagnosis.
In this case, Roll-2-Roll Technologies programs a PLC, so you are able to set the parameters (or recipes) that best suite your operation for web width measurement. Learn how set up or change these recipes in your PLC in this video.
Transcript
Show full transcript (1078 words)
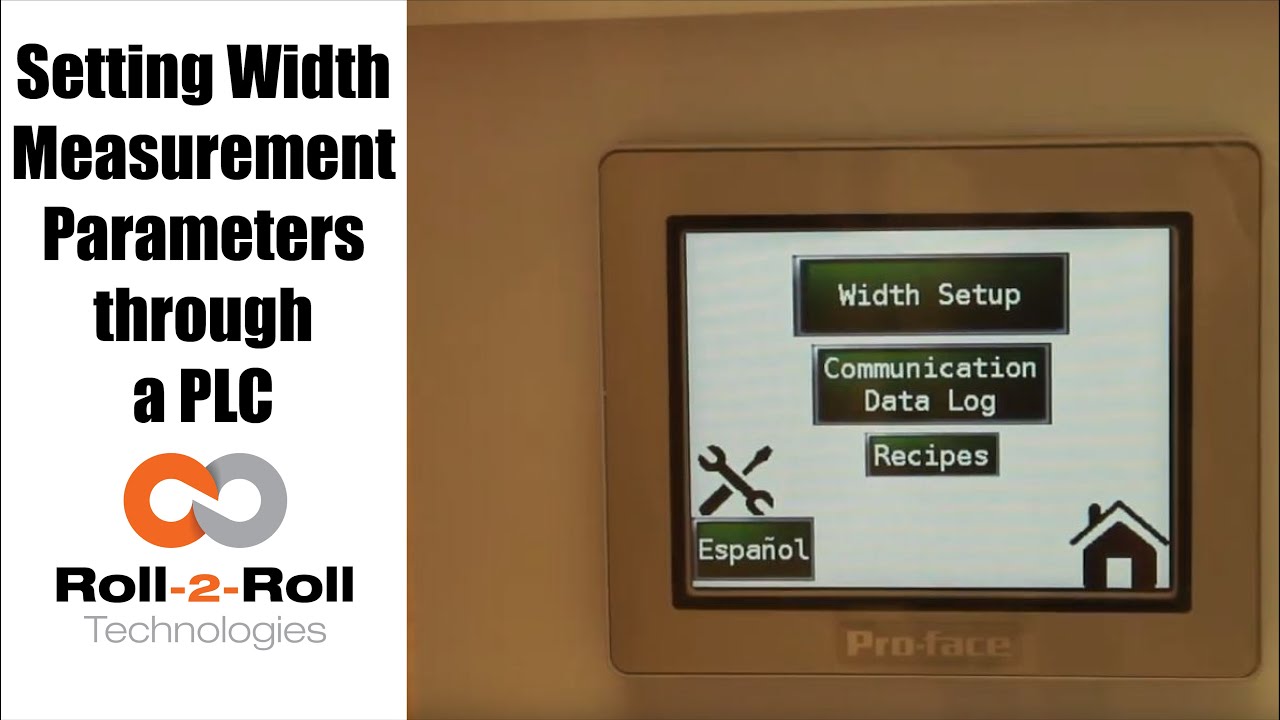
so in order to set up the Center for British Mint and we'll go over this menu once one more time we're going to go to the setup screen right here and then click on width setup then we can enter our nominal width the alarms the warning ranges and all those things first we want to whenever we have a new product in there we want to measure the product what the width of the product is in this case it's 153 millimeters we're going to enter 1 5 3 enter and then we're gonna set the warning to be point four millimeters so if the alarm is less than the warning the system will not accept it so the best way to do that is to make sure to set the alarm first so we'll set the alarm at 1 millimeter and there is a way for us to set a symmetric alarms so the positive range can be 1 millimeter and the negative range can be 0.5 millimeters if we want it to so in this case I'll set it at at 0.8 millimeters and then the warning range in this case let's set it to 0.4 millimeters and we have set everything what we want to do is to say hey this is the right one so we say record wait what it does is it teaches the sensor to say hey this is the nominal width we're looking for and I have presented the web with the right width and it'll take the measurement from then on so if you go back to the home screen it's going to show you the measurement and as long as it's within the range you're gonna have the green light whenever it goes to the warning limit it's gonna go to Amber and then whenever it's about the alarm it's gonna go to the red light these are actually also triggering a digital output on the PLC so we can connect a stack light with three outputs so connect the red sorry red amber and green to the three signals in the stack light the other thing that we want to point out a little bit more is the recipes so sometimes you might not see it you just have to click on this to say display recipe so what we have provided is an option for you to save seven different product recipes you can scroll through them and let's say we want to pick up product seven and we want to use that as the recipe what you need to first do is pick that number click on load and it's going to load the data here right now it doesn't have anything so let me go to one which has something ok so now I loaded product 1 and it had some values there so we'll have to load it once you load it it's loading is just for display purposes you need to press accept to accept that recipe so that it will be sent to the front screen for width measurement in this case I want to make sure to make some changes if you want to make the changes you can directly click on that width value and I'm going to enter 153 and then alarm as one date and then warning as 0.5 once I enter that if I press accept it's gonna send it to the front screen if you ever change a recipe you need to make sure to save it so right now I can press save now it saves it to the memory so that means that anytime you go back to that recipe and come back to one it will retrieve that data so make sure to remember to save it so two things one is if you want to load something it loads it here so we want to do that loads it here and if you want to take this recipe and put it into the front screen you need to press accept and any time you change the recipe you need to make sure to save it so that's the thing about recipes you have an option to say about seven recipes here there is also an option to log the data as you make the measurement there is a USB on this PLC so what you can do is you can connect a USB there and click on start logging it will it will start logging the data and whenever you're done you're gonna say stop logging and it'll stop logging the data and then you can take the USB off from there there are a few other settings here that you can set up as well these are advanced settings there is an option to override the minimum contrast in our sensor the minimum contrast is used to say whether something is an edge or not in the picture so by default we have 50 so we can have that and if you want to enforce that you need to press this button so that it changes into lime green instead of dark green whenever you want to disable you press that it disables that and this is the place where you can enter the value you can also make the sensor provide the data that is already filtered so if you want to do that you turn on the filter turn the lime green turn off the filter it goes off this is an advanced feature which is called as a minimum measurement quality whenever we take a measurement we have an output called quality factor and we can set that nominally it's ten millimeter ten is the minimum quality factor now if you want to make it higher you can set that value and enter it there so as long as there is a value it's going to take this value if you want to disable that option press n zero so I press ten and enter and it'll be that that's the minimum that you can provide so this screen is more like an advanced screen your operator wouldn't really have to do this only people engineers that are setting up the system can use this for troubleshooting purposes and stuff like that and yeah that's about it so these are the features there and like we talked about before we also have the option to log the data and showing the log of the data right here you